How to use myBlueRidge for Student Planning and Registration
Using a current version of a web browser such as Google Chrome, Internet Explorer 11, Microsoft Edge Browser, or Mozilla Firefox, go to either:
- The Blue Ridge Community College website at www.blueridge.edu, access the “Students” link in the top right corner. This link opens the “Student Panel” and allows access to WebAdvisor and myBlueRidge.
- The MyBlueRidge website at https://my.blueridge.edu
Log in using your Blue Ridge Community College username and password. This should be the same username and password you use to log into Moodle, your @webmail.blueridge.edu email account, and WebAdvisor. If you are new to Blue Ridge Community College or do not know your username or password refer to the First Time Login instructions at the end of this document.
Getting Started
You can start your academic planning two different ways:
- Use the MyBlueRidge Student Planning system to create your own draft academic plan and submit your plan to your academic advisor for review
- Contact your academic advisor first to schedule a meeting where you can both work together to develop your academic plan.
Overview of how to use the MyBlueRidge Student Planning system:
- Use the “View My Progress” link under the MyBlueRidge Student Planning menu to see what courses you need to take to complete your academic degree
- Select courses you need to take to complete your academic plan and click the “Add Course to Plan” button
- Once you have added courses to your plan, go to the “Plan & Schedule” menu within the Student Planning system, click on the “Advising” tab under and then click the “Request Review” button.
- Depending on which academic program you are currently enrolled in, your advisor might need to review and approve your plan before you are able to register for classes
- Once your advisor has approved your plan, you can go back to the MyBlueRidge Student Planning system to schedule and register for specific course sections.
Need Help?
- Click on the Help icon in the upper right of the MyBlueRidge system

- Contact the Blue Ridge Community College Help Desk at (828) 694-1895 or email to helpdesk@blueridge.edu
Detailed Instructions
Once you log into MyBlueRidge, click on the “Student Planning” menu item.

The Student Planning “Home” view will display your current Program, Cumulative GPA and Progress. The progress bar indicates where you are towards your graduation. You will also see your current course schedule. Please note if you are taking an online class that does not have scheduled meeting times, it will be listed at the bottom of your course schedule. (See example below)

The “My Progress” view will display a very detailed description of your progress toward your current degree, diploma or certificate programs. If you are enrolled in multiple programs, you might need to click the arrows to select between your current programs.
You can see your Cumulative and Institutional GPA, Major, and the catalog year of the degree program(s) for which you are currently enrolled.
The progress bar indicates:
Total Credits Completed (dark green)
Credits in Progress (light green)
Planned Credits (yellow)

Requirements:
This section will display what is needed to complete your program of study. Each of the sections are color coded to let you know where you stand in completing a section. The color code is as follows:
Completed – Green
Fully Planned – Yellow
In-Progress – Light Green
Not Started – Red
Fulfilled – Light Blue
See example of academic progress view below.
How to preview another academic program
You can click on View a New Program button to get a quick preview into where you would stand if you were to transfer into another program or change your academic major. The ‘View a New Program’ feature only provides you with a quick preview of another program. It will NOT enroll you in a new program or change your academic major. You must work with your advisor and the Registrar’s office to change your academic program.
View the degree requirements for any program you are interested in, by searching and selecting a program below. The credits you currently have will be added to the new program so that you can see what would be needed to complete another program.
If you view another program, you will get a message that states:
“Student is not enrolled in this program. The display of this program information is temporary and it will be removed as you leave or refresh this page.”
Example of viewing a new program:

Example of academic progress view:

Planning and Scheduling Classes
Click on the Plan & Schedule link on the Student Planning home page
Once you click on “Plan and Schedule you will see “Schedule, Timeline and Advising
The “Schedule Plan” will default to the current term, but if there are other terms available for planning purposes, you can access them by clicking on the arrow button.
Clicking the arrow to the right – will display upcoming terms when they are available
Click the arrow to the left – will display previous terms

The “Timeline” tab will show you the current term, but you can look at previous terms from this screen by clicking the left arrow button.
The “Advising” tab will list your Advisor. Students can compose a note and send to their advisor asking for permission to register for classes. Also, students can ask for guidance about issues they may have.
Course Catalog
This view lists every course available at Blue Ridge Community College. Be sure to look at the schedule of courses offered for the semester you are planning for before using this feature.

Courses can be searched by “Course Subject” or “Course”
Course Subject: Click on the Subject category. (ex. I selected the subject of English)
You will see a list of “English” courses offered for the semester.
You can filter by location, terms, day-of-week, time-of-day, instructor, academic level, course level, course types, topics, and instruction type by click on the check box located next to the filter.

You can either add a course to your overall academic plan OR you can add a specific course section to your schedule.

Click on “View Available Sections for ENG-111” located below the course descriptions in grey.
Note: This view gives you details about the course you are taking such as a Course Description, Requisites (courses that must be taken before enrolling in class) and the location of the course offerings. Under the View Available Sections tab,
- Seats - how many seats are available
- Times - the times the course meets
- Locations – where the class is located
- Instructors – who is teaching the class

To select your Class
Click “Add Section to Schedule”- you see the following details about the section.
- To add the section to your schedule, click on the “Add Section to Schedule”
- If you do not want to “Add Section to Schedule, click “Close”

Continue the above process for selecting the classes that you want to schedule for the semester.
How to Register for Planned Classes
If you want to register for a section that you added to your schedule.
Click on “Plan & Schedule” located at top of page

As you can see, your scheduled section will appear on the calendar in yellow on the day of the week it is offered and at the time of day it is scheduled.
If you have any classes in “green” on this page – it means that you have registered for the class.

Request Review
Using the Advising menu:
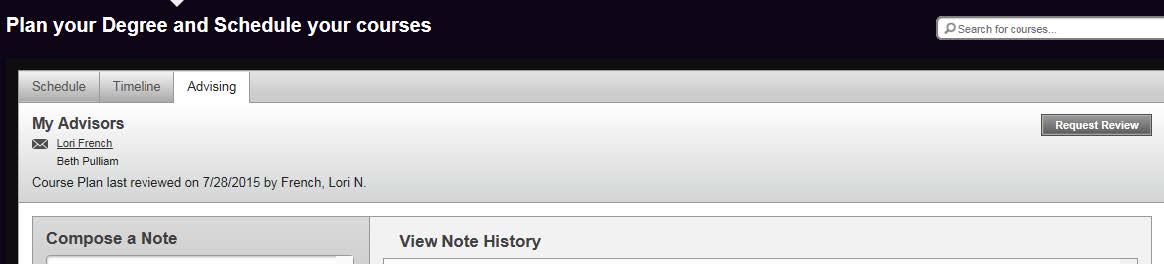
To “Request Review” of your planned schedule. Click “Request Review”
Once you “Request Review” your advisor will approve/deny your selection(s). You will then be able to register for your sections by clicking “Register” on each of the planned courses.
Once you have registered, you will notice that your section indicators change from yellow to green. If you decide to drop the section, you can click on the drop button.
Under the Advising Tab, you can see communications from your Advisor. You can also send a note to your advisor.

View Placement Test Activity
To view a summary or your Placement Test activity, click on the test Summary button.


To Access Unofficial Transcript
Click on the link labeled “Unofficial Transcript”

Click on “Download Program Evaluation Transcript (PDF)
Click “Open” to view the PDF file once it is downloaded
Note: All official transcripts must be requested through our website.